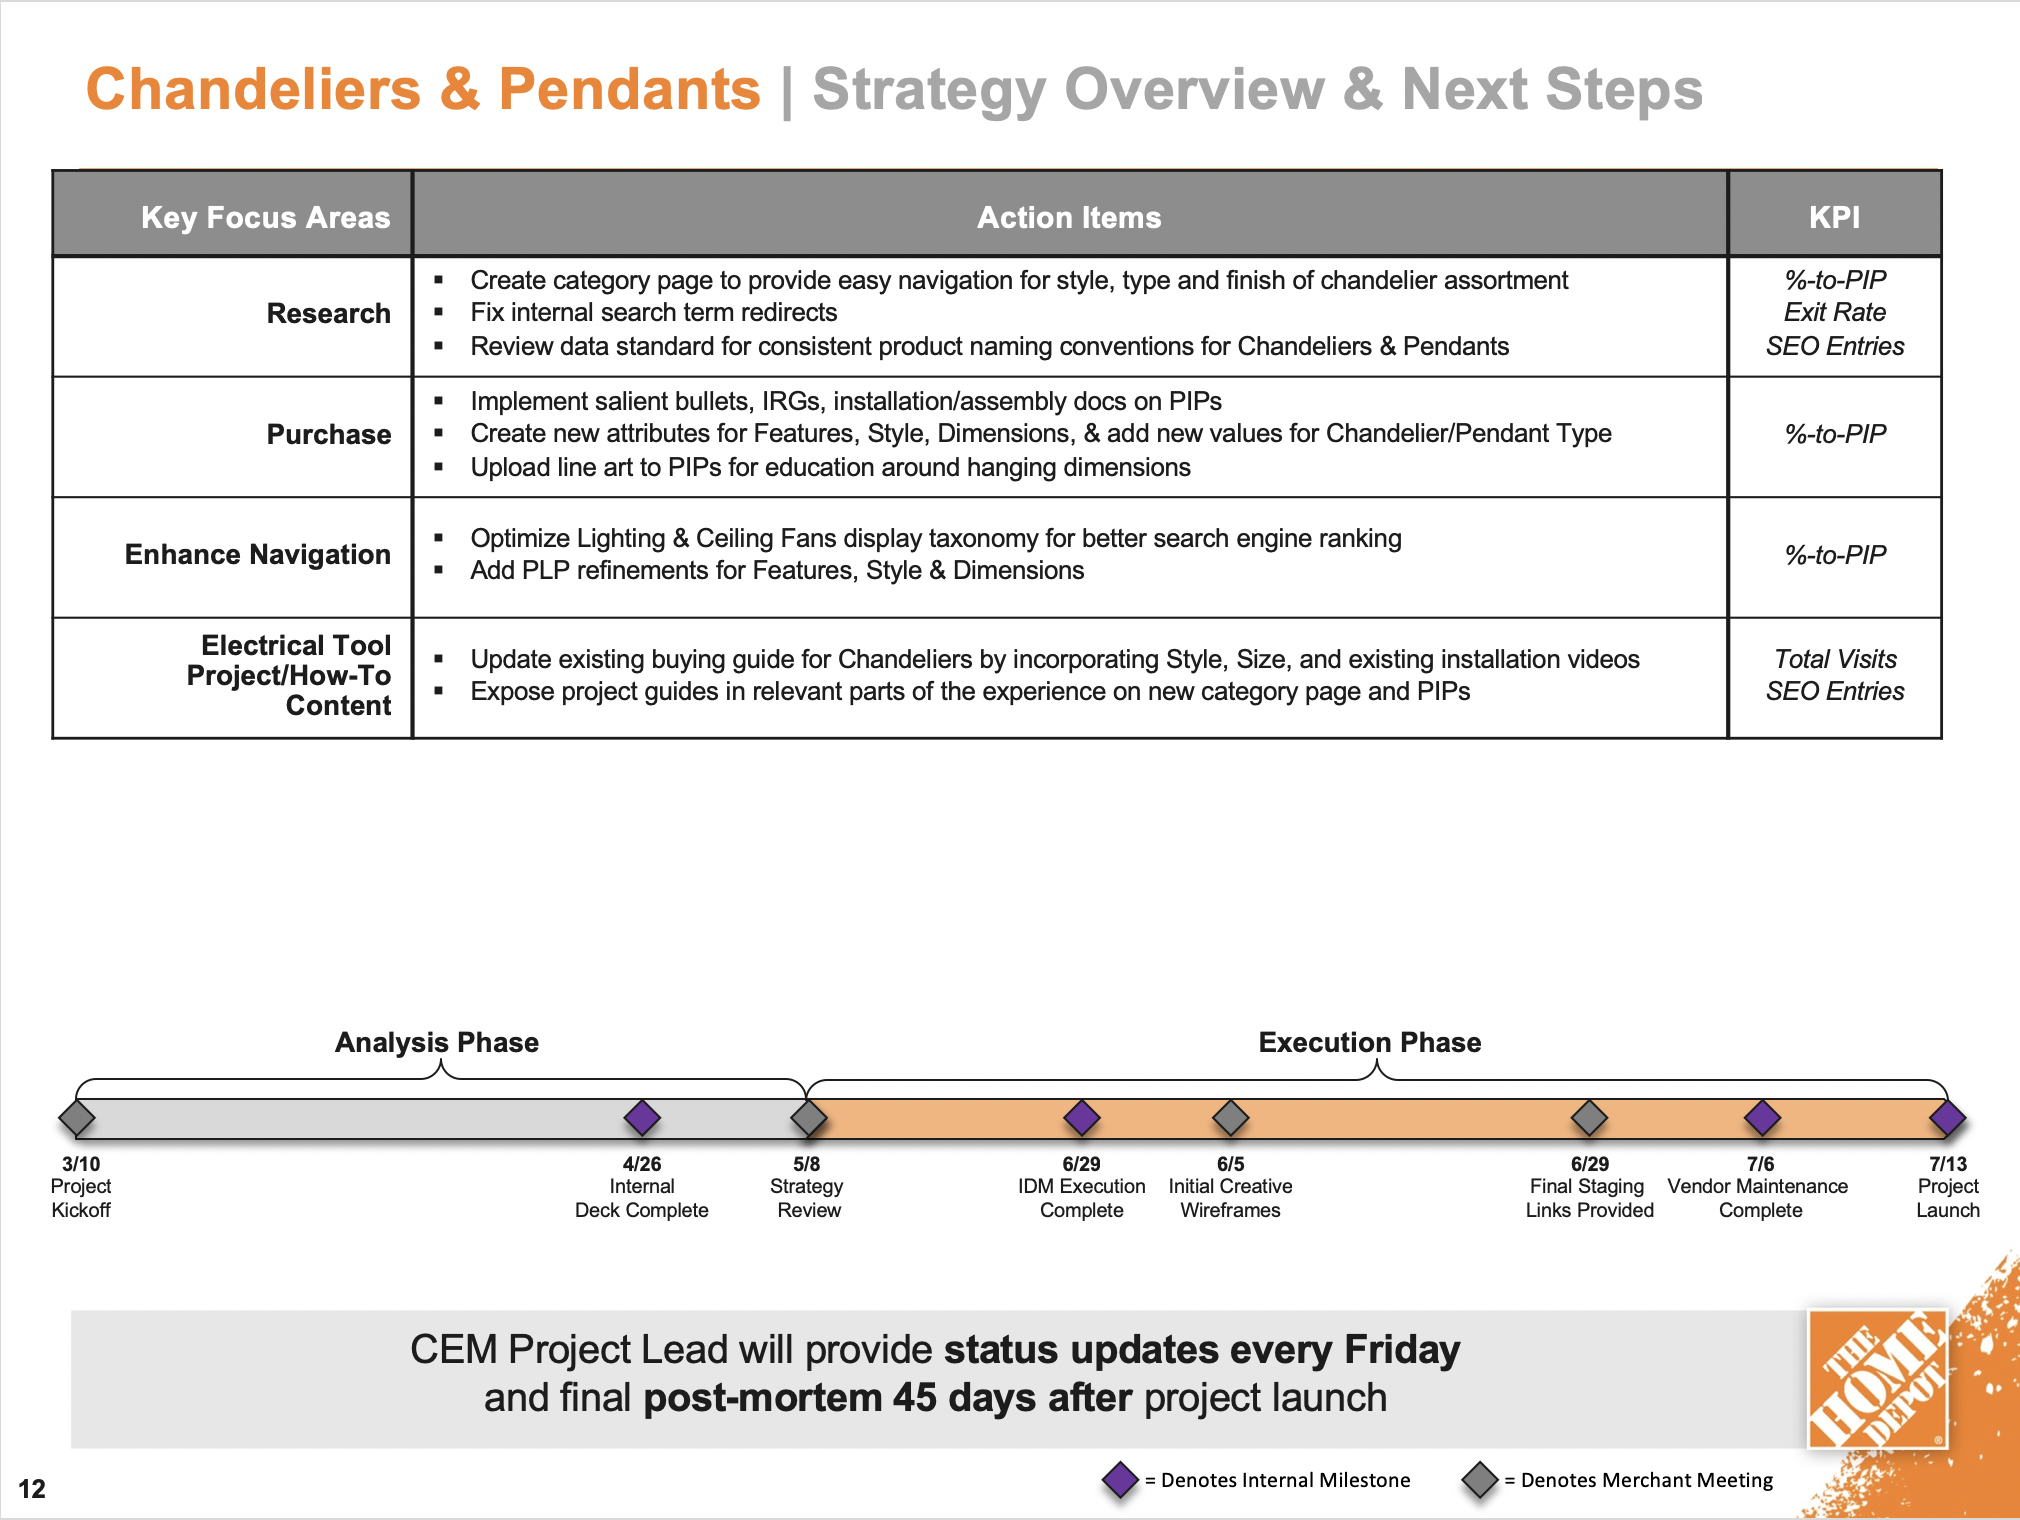
Chandeliers Journey Mapping Session
My UX Process
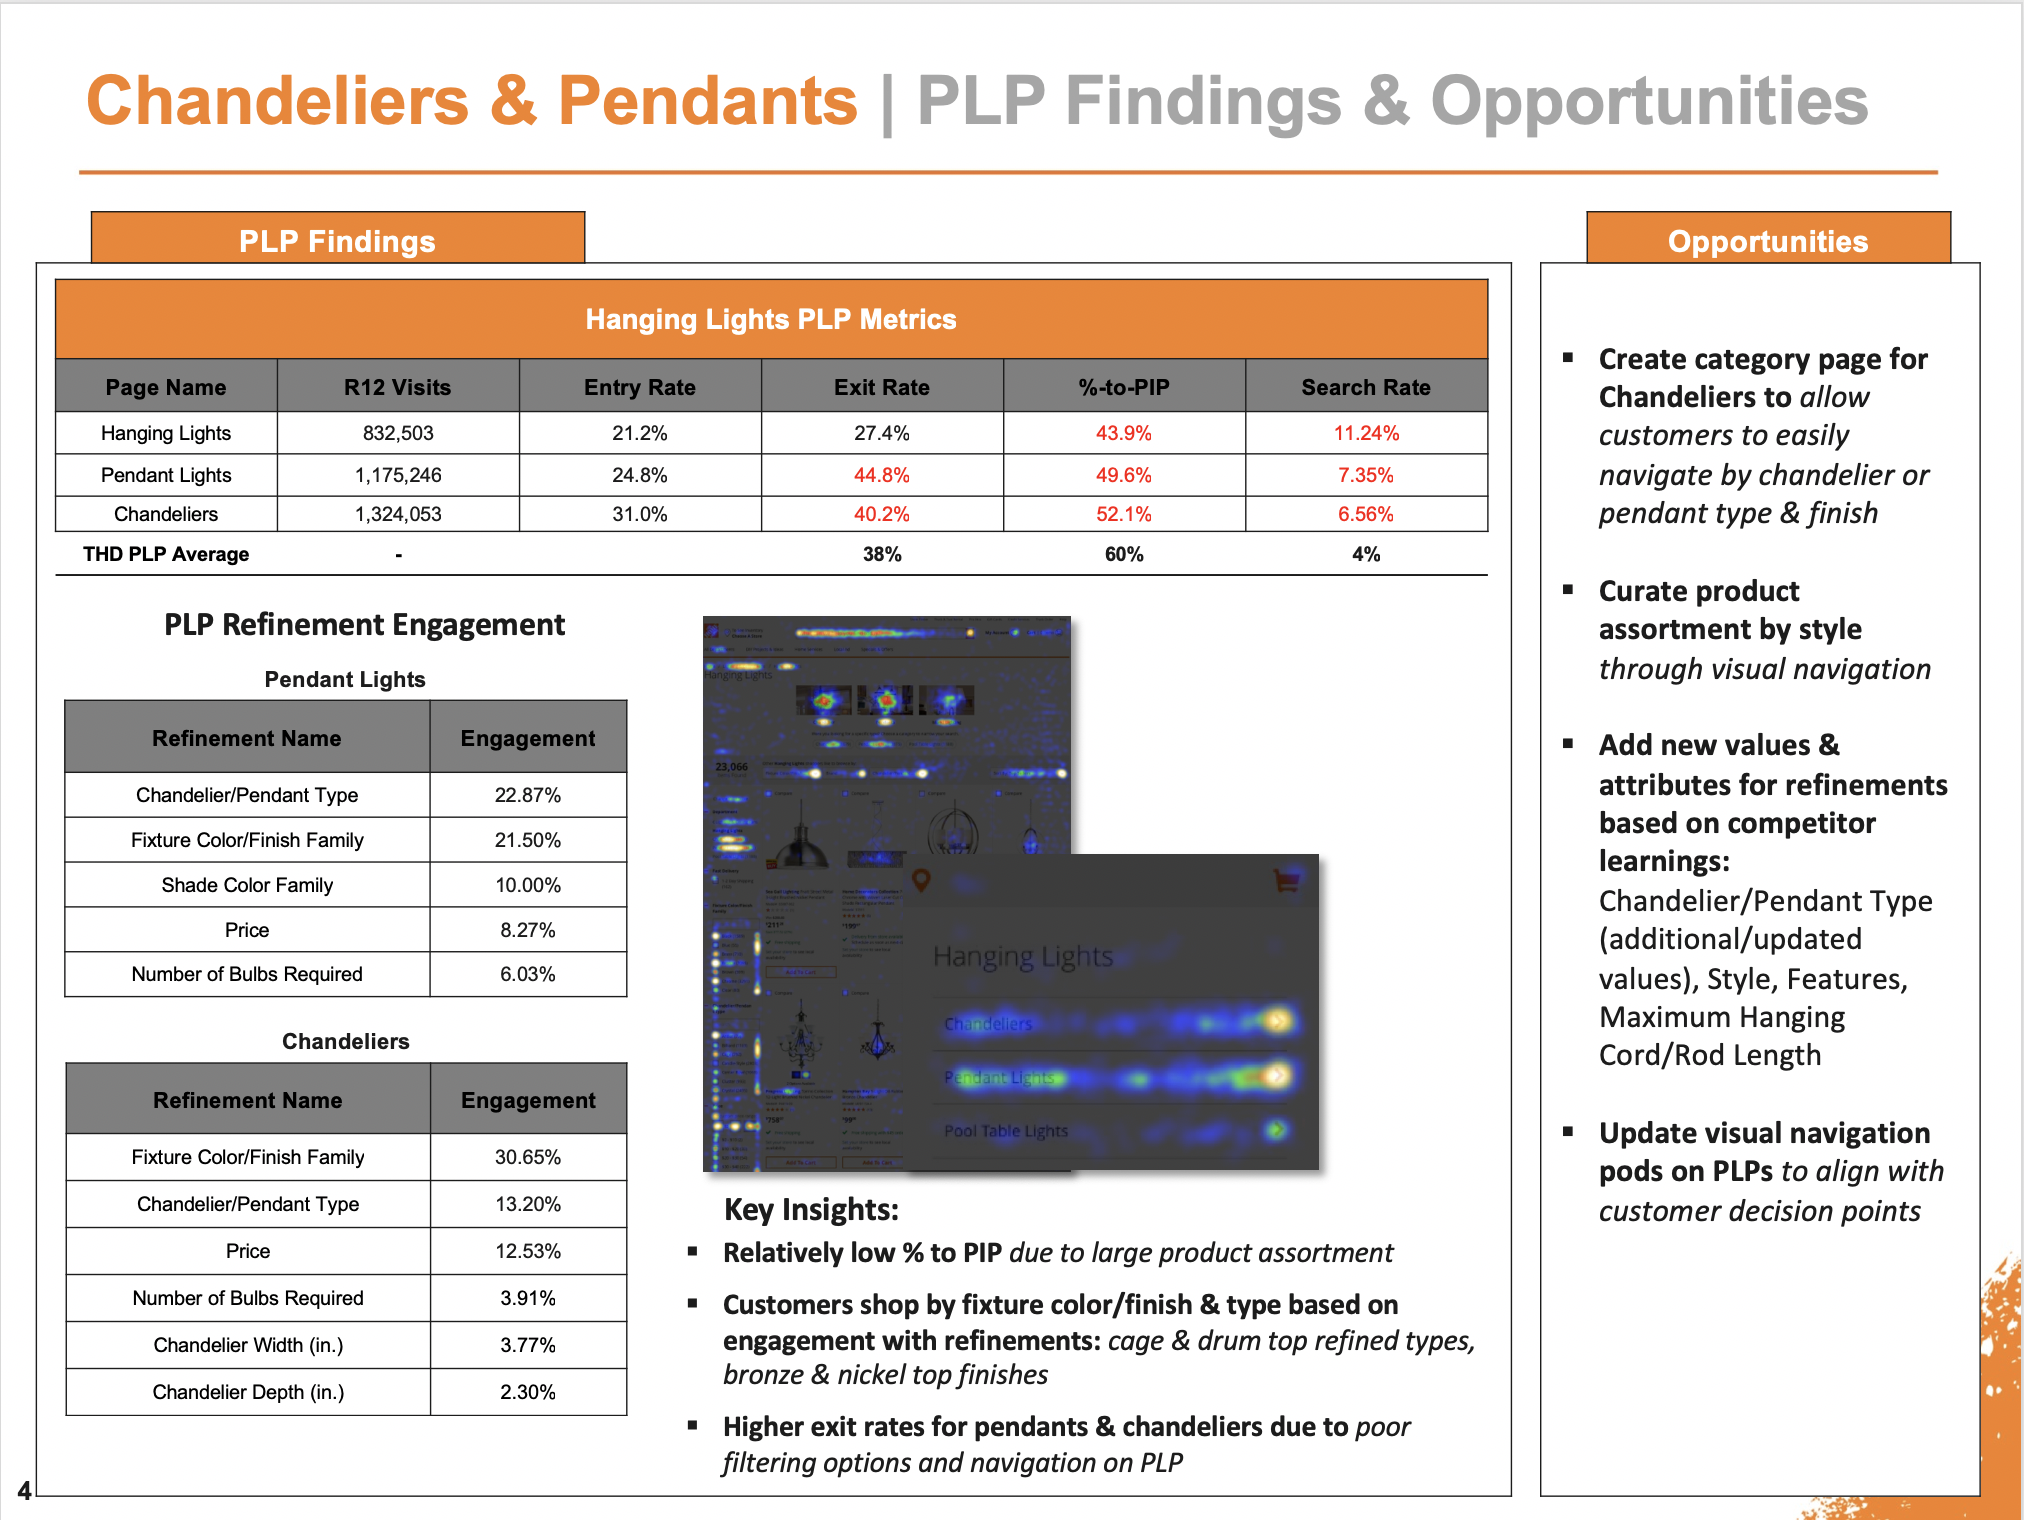
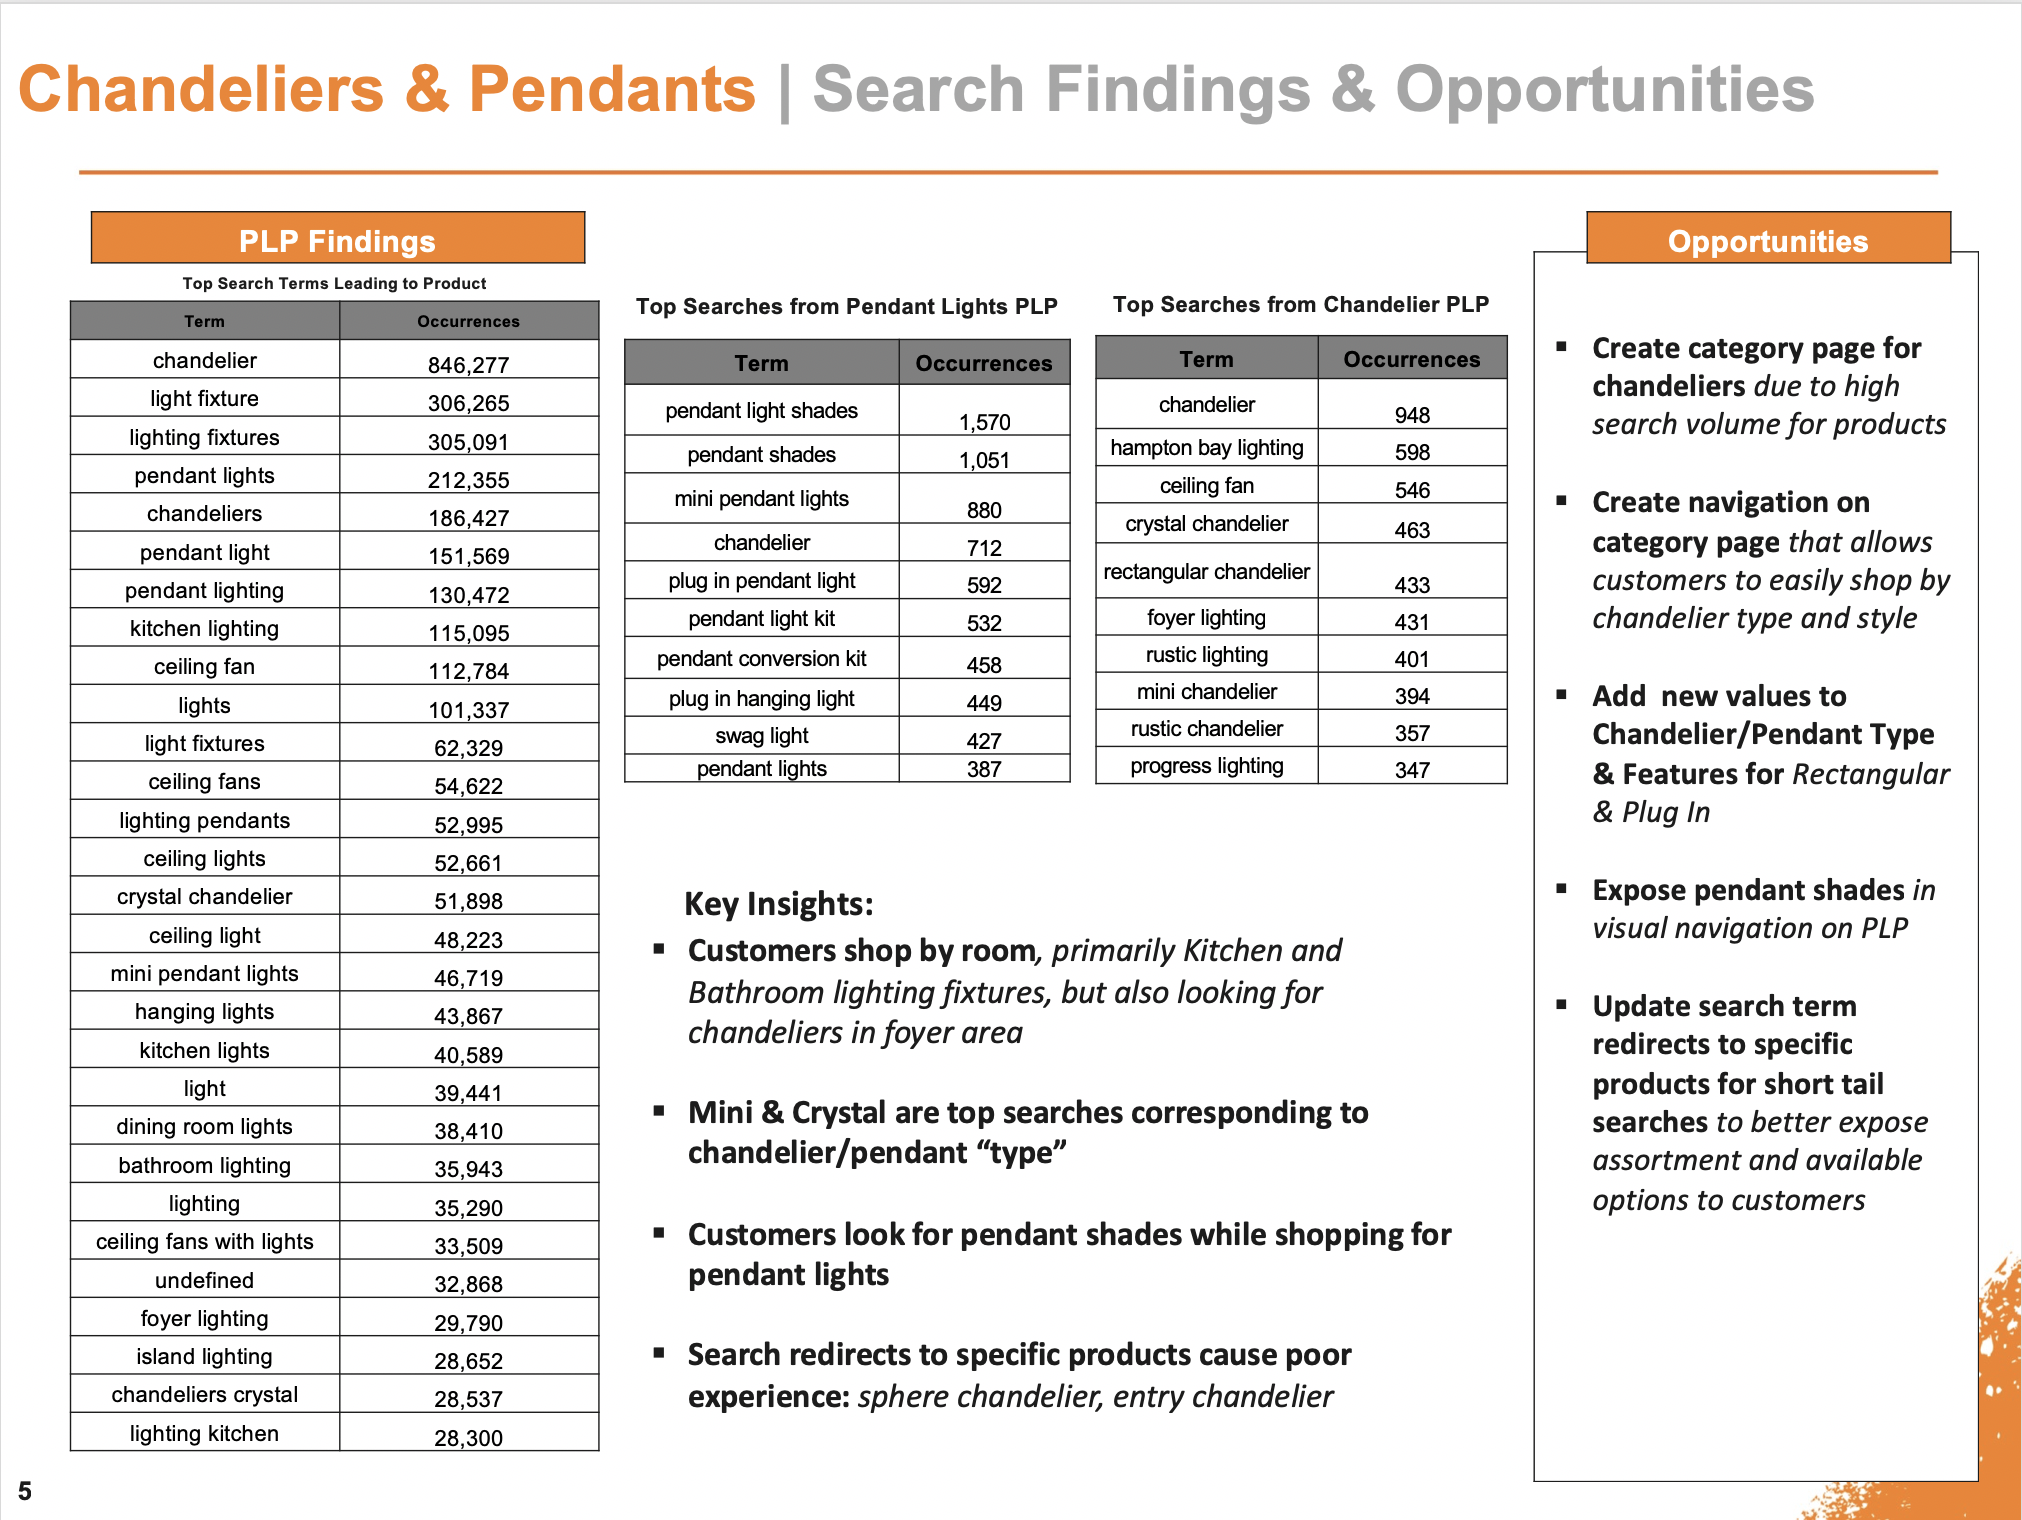
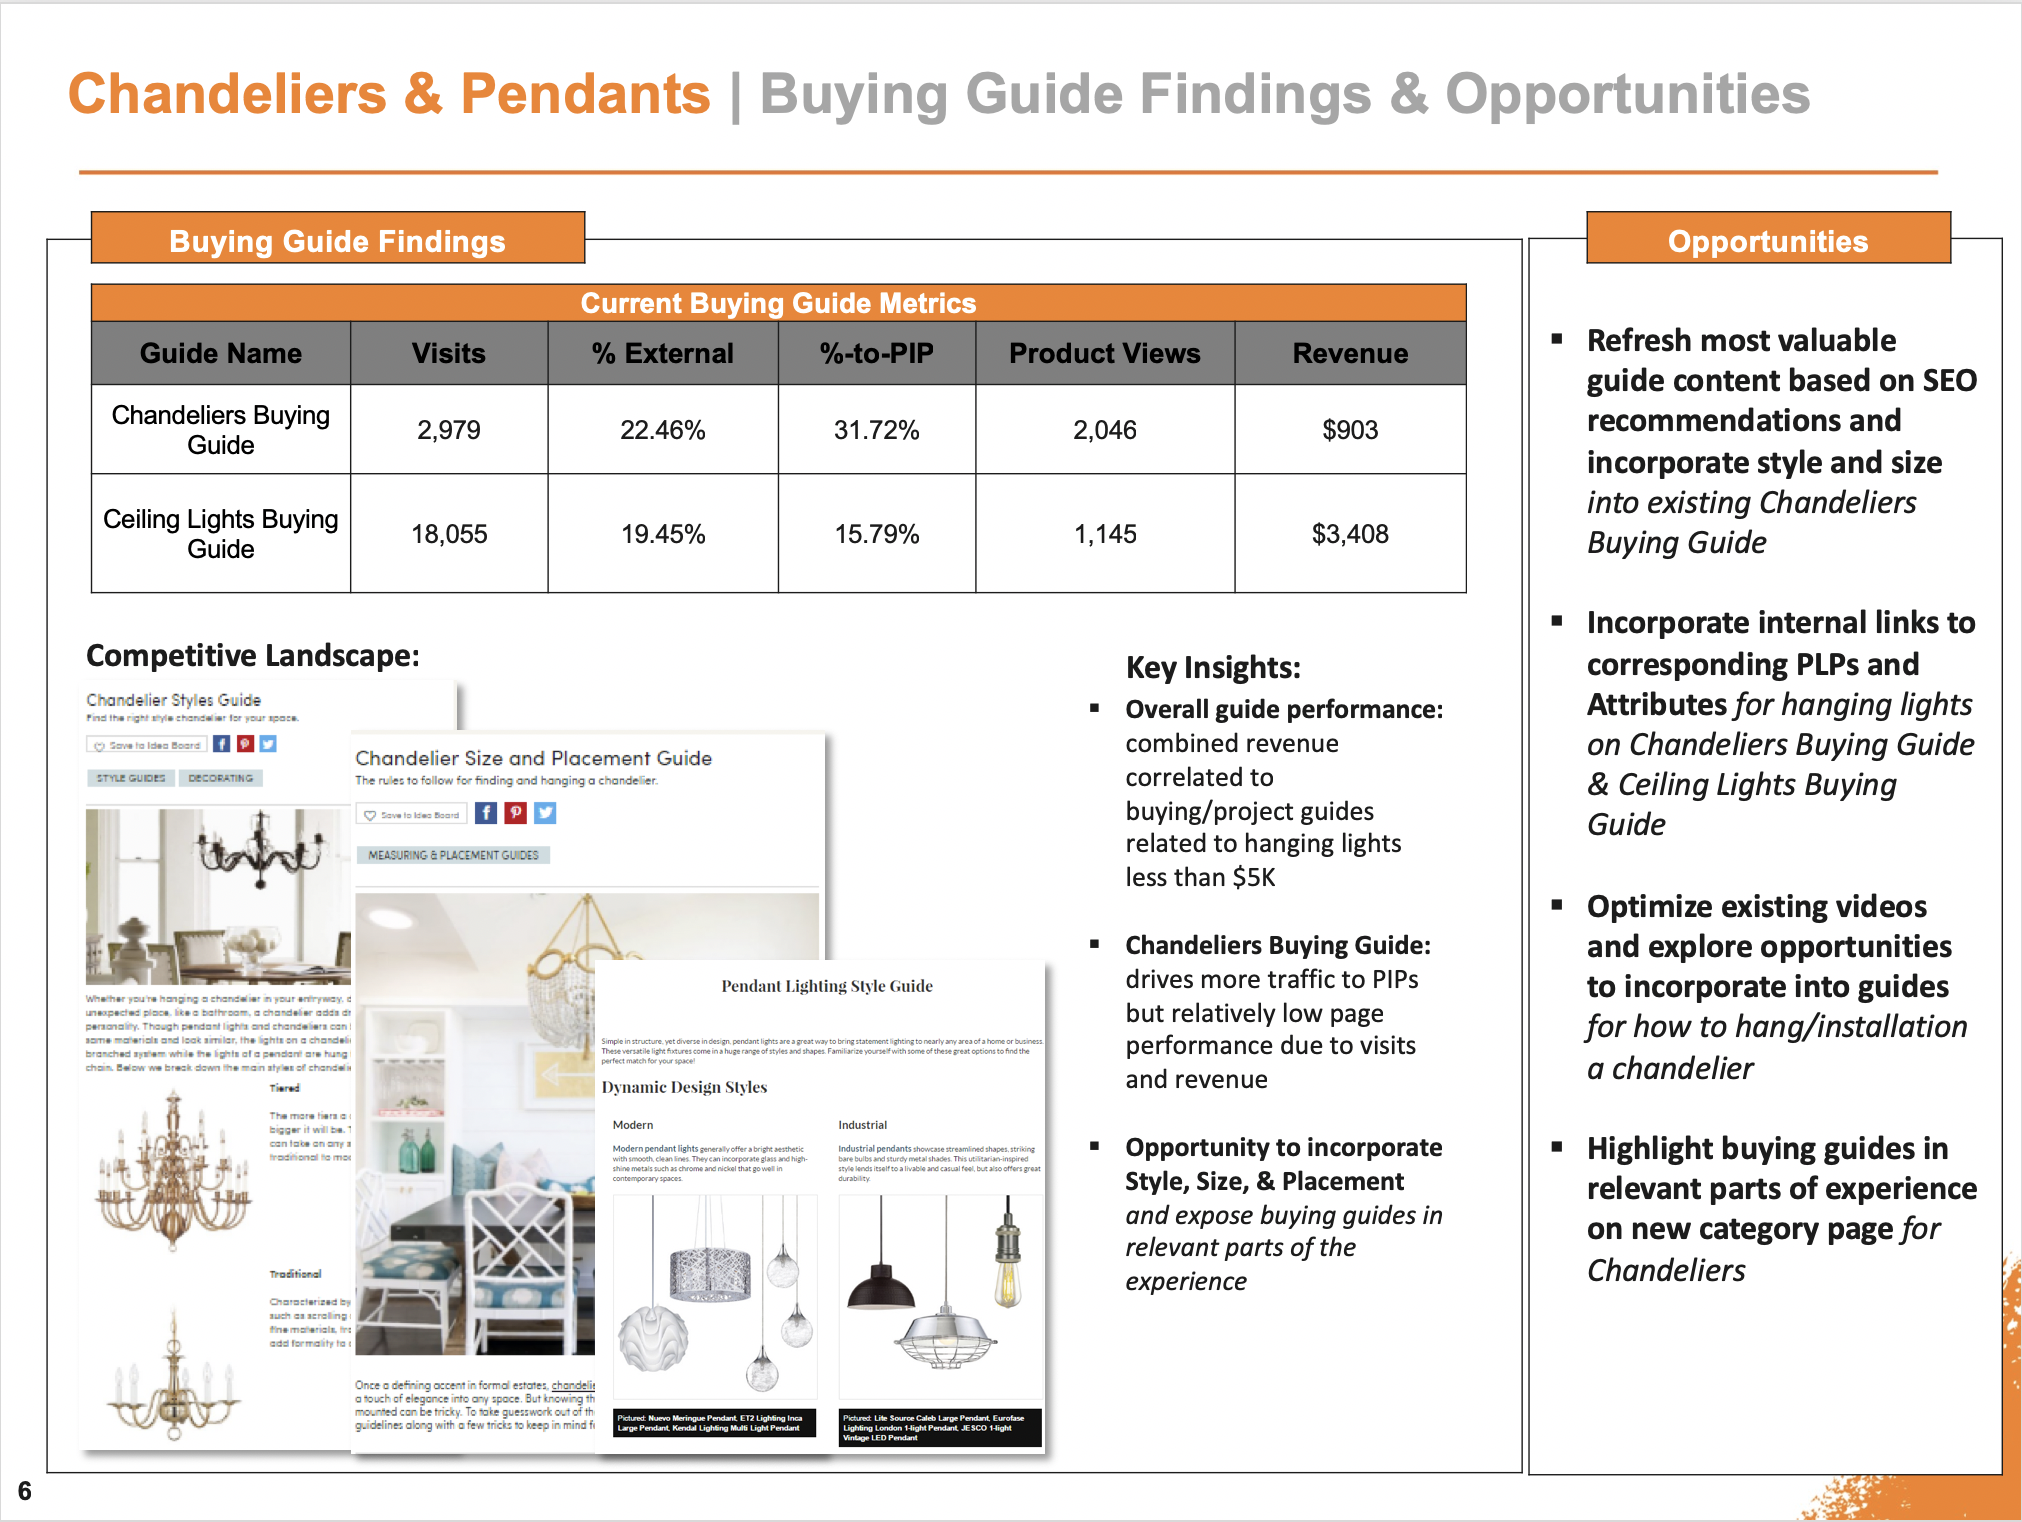
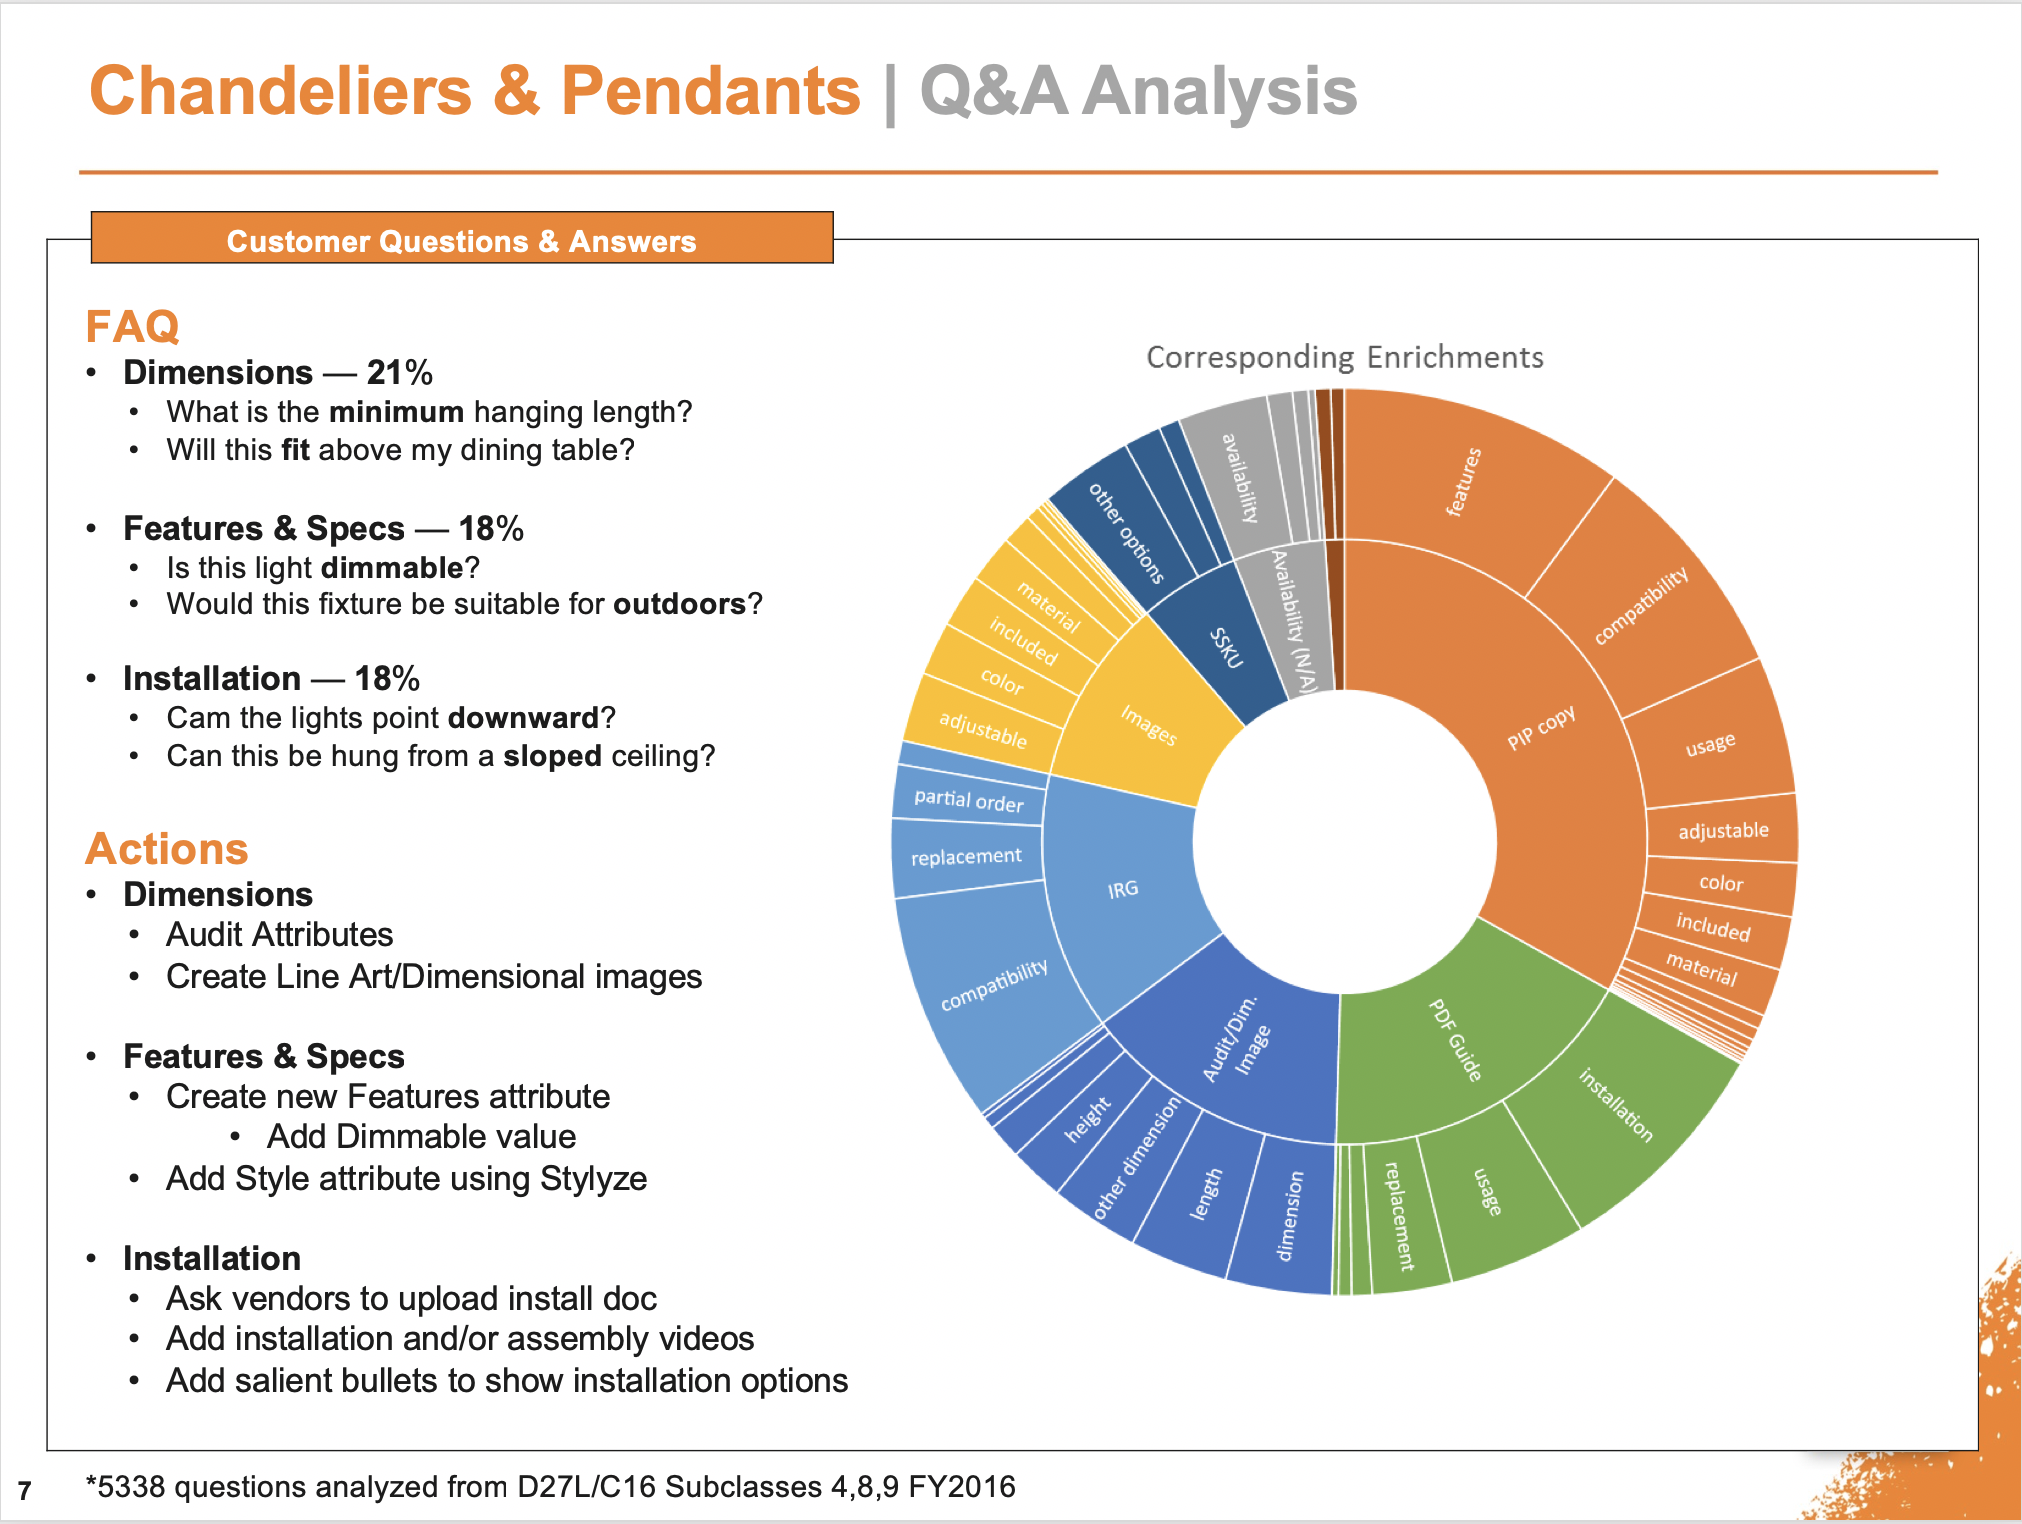
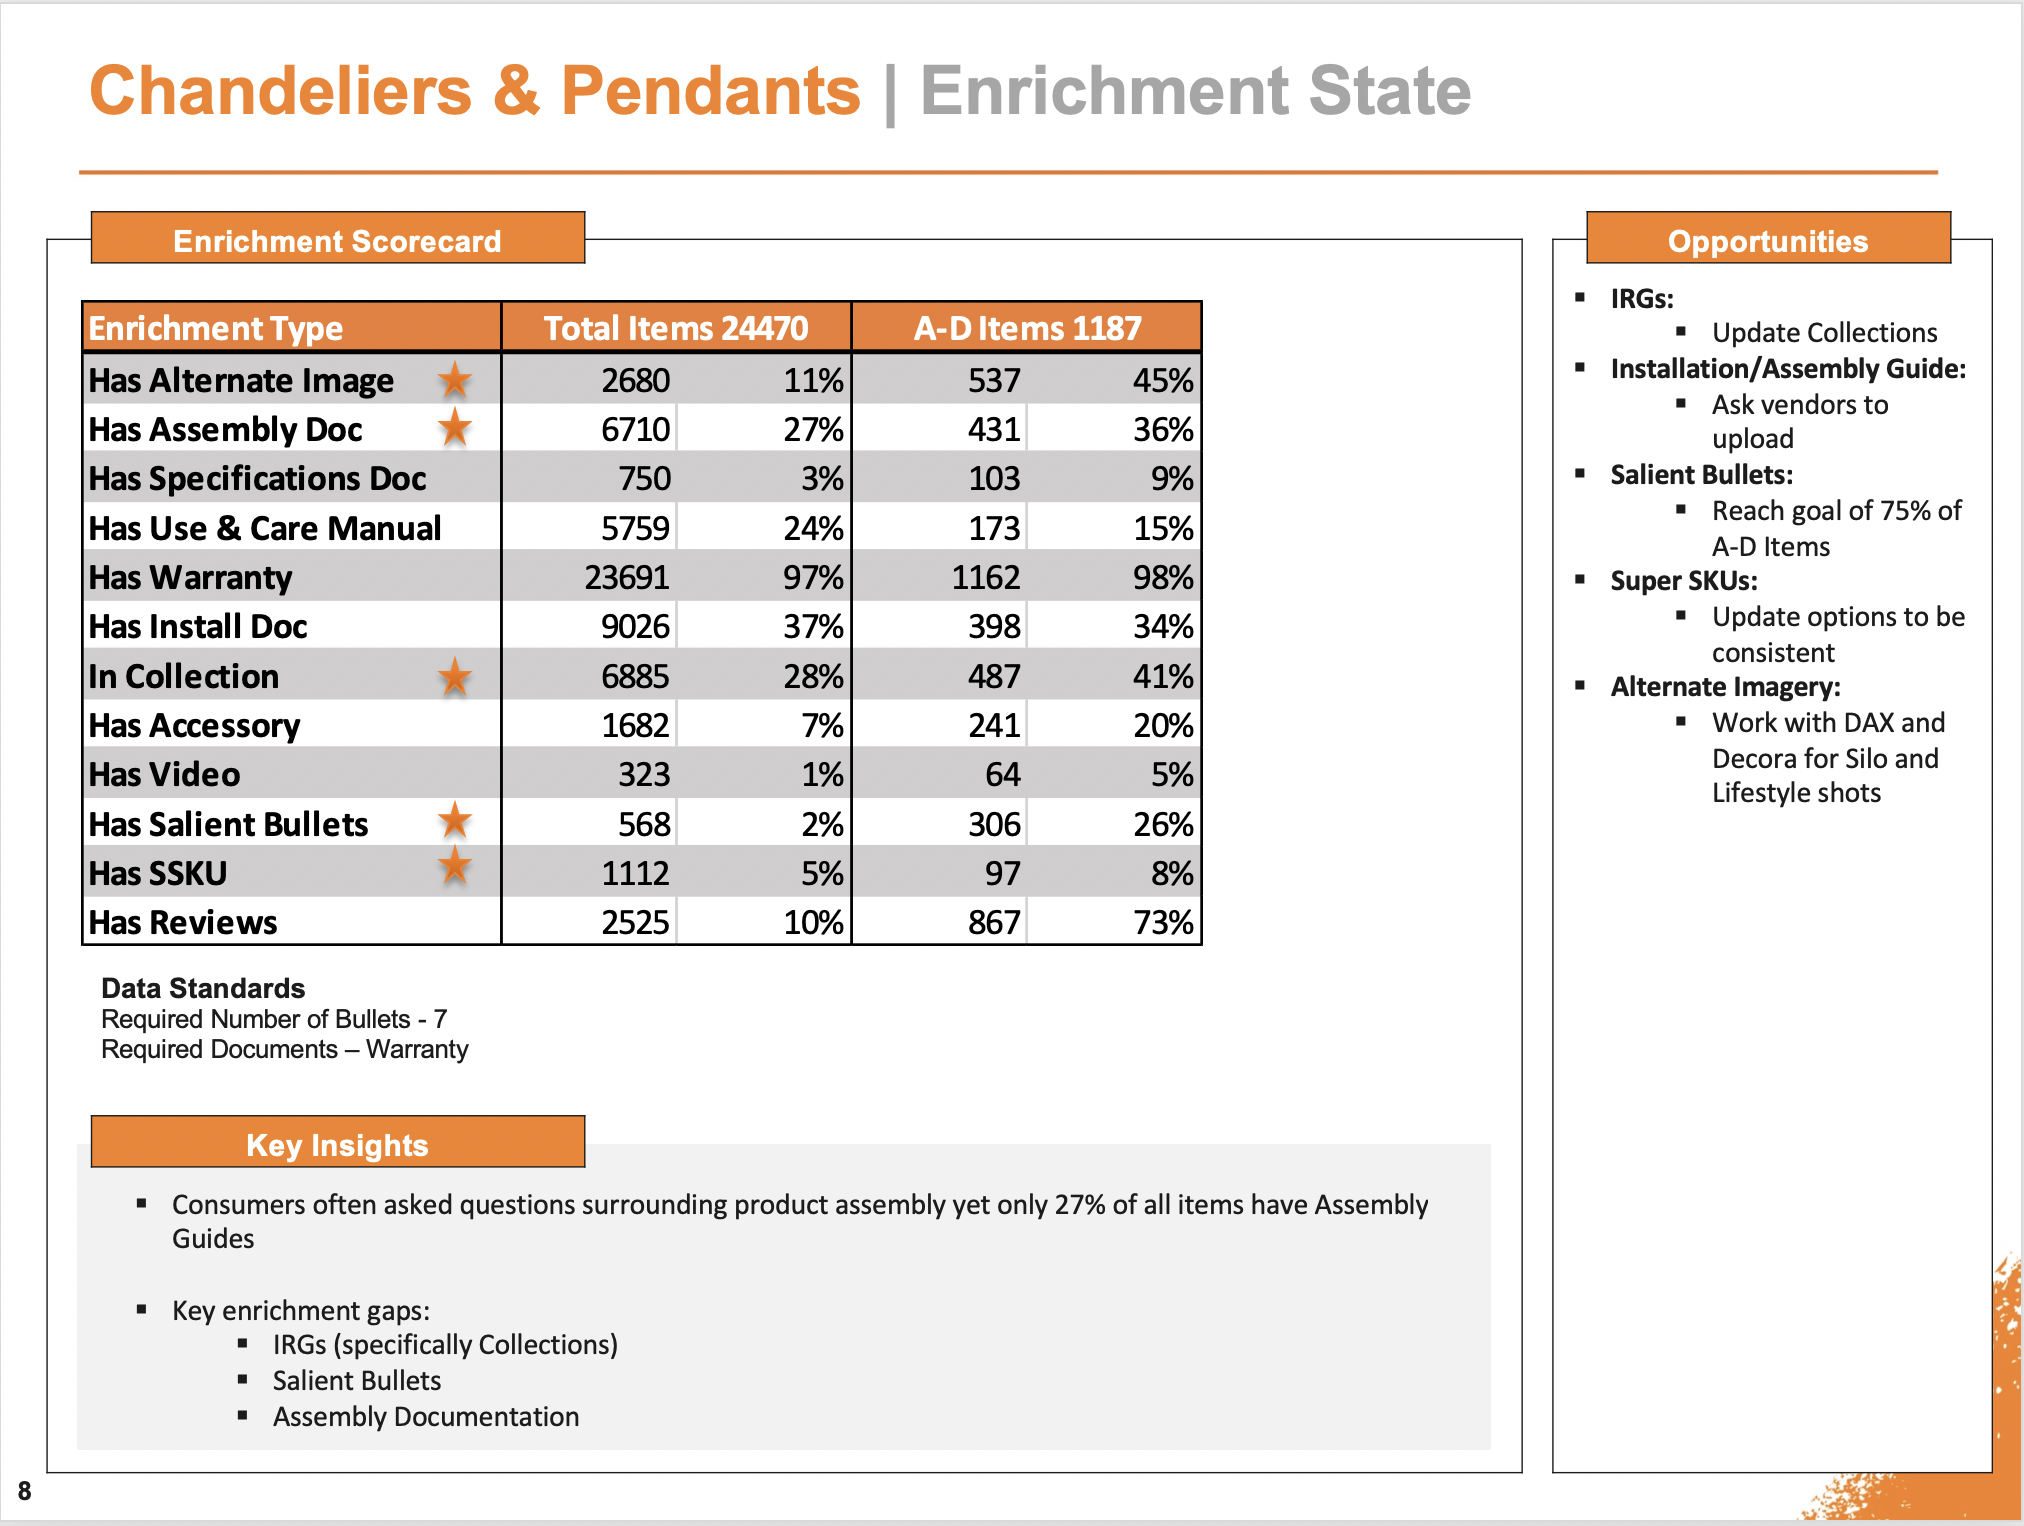
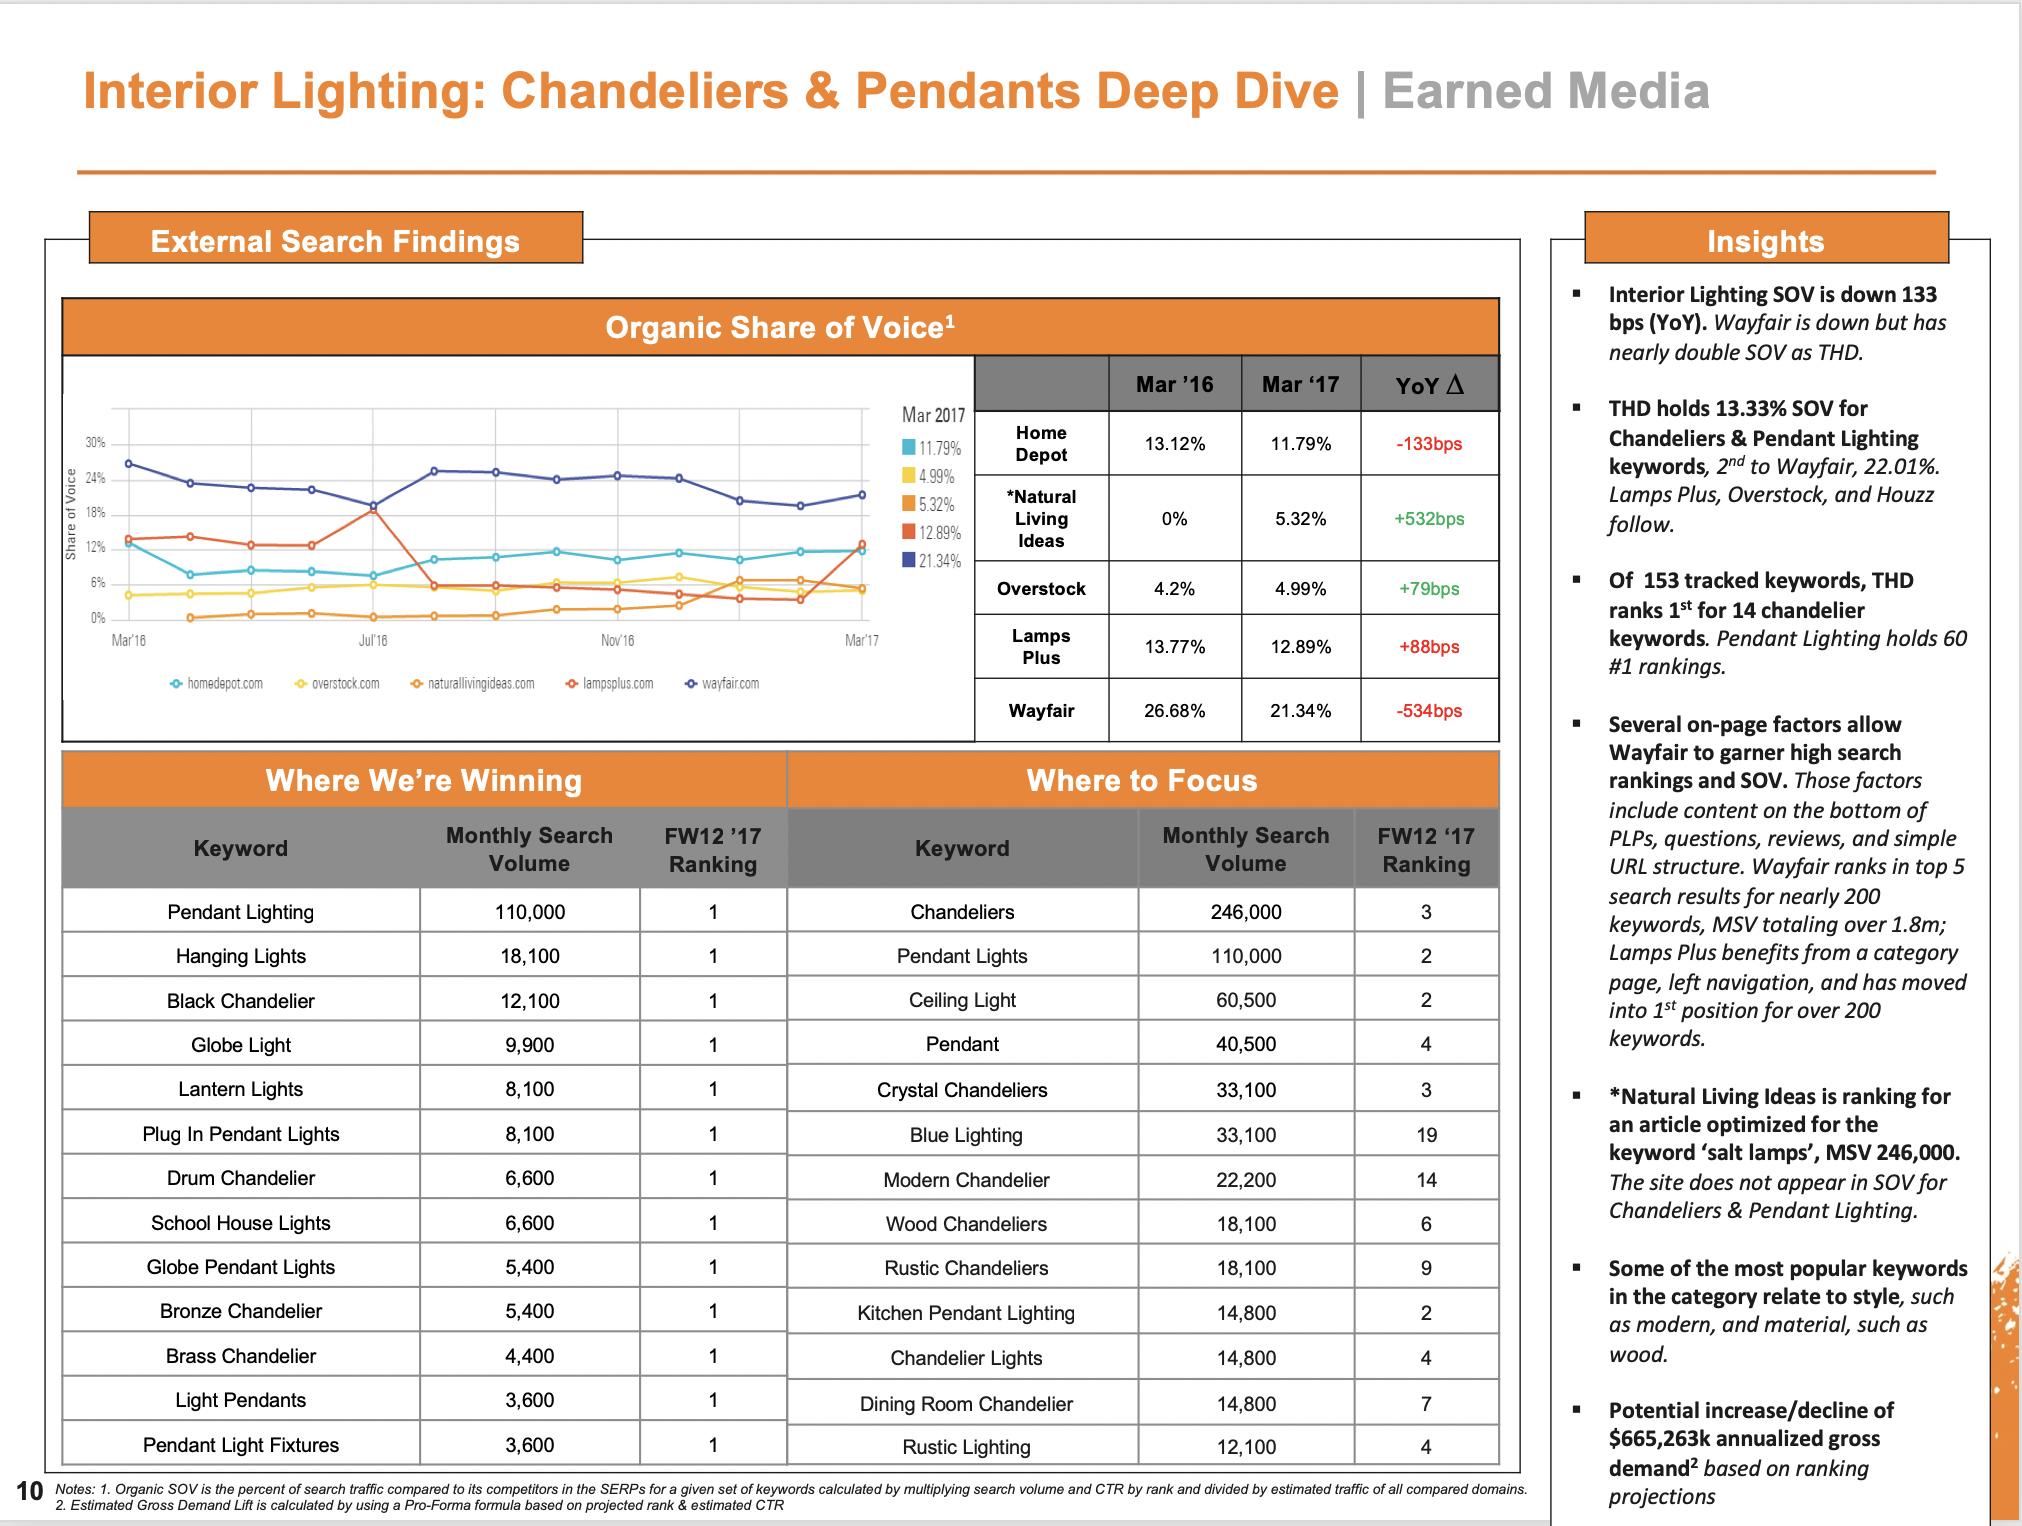
Research with Analytics - The process starts with a deep-dive of analytical reports such as Heat Maps of existing pages, various SEO and Keyword Reports as well as competitive data to better understand our customer needs and current friction points (which reveal our opportunities for improvement).
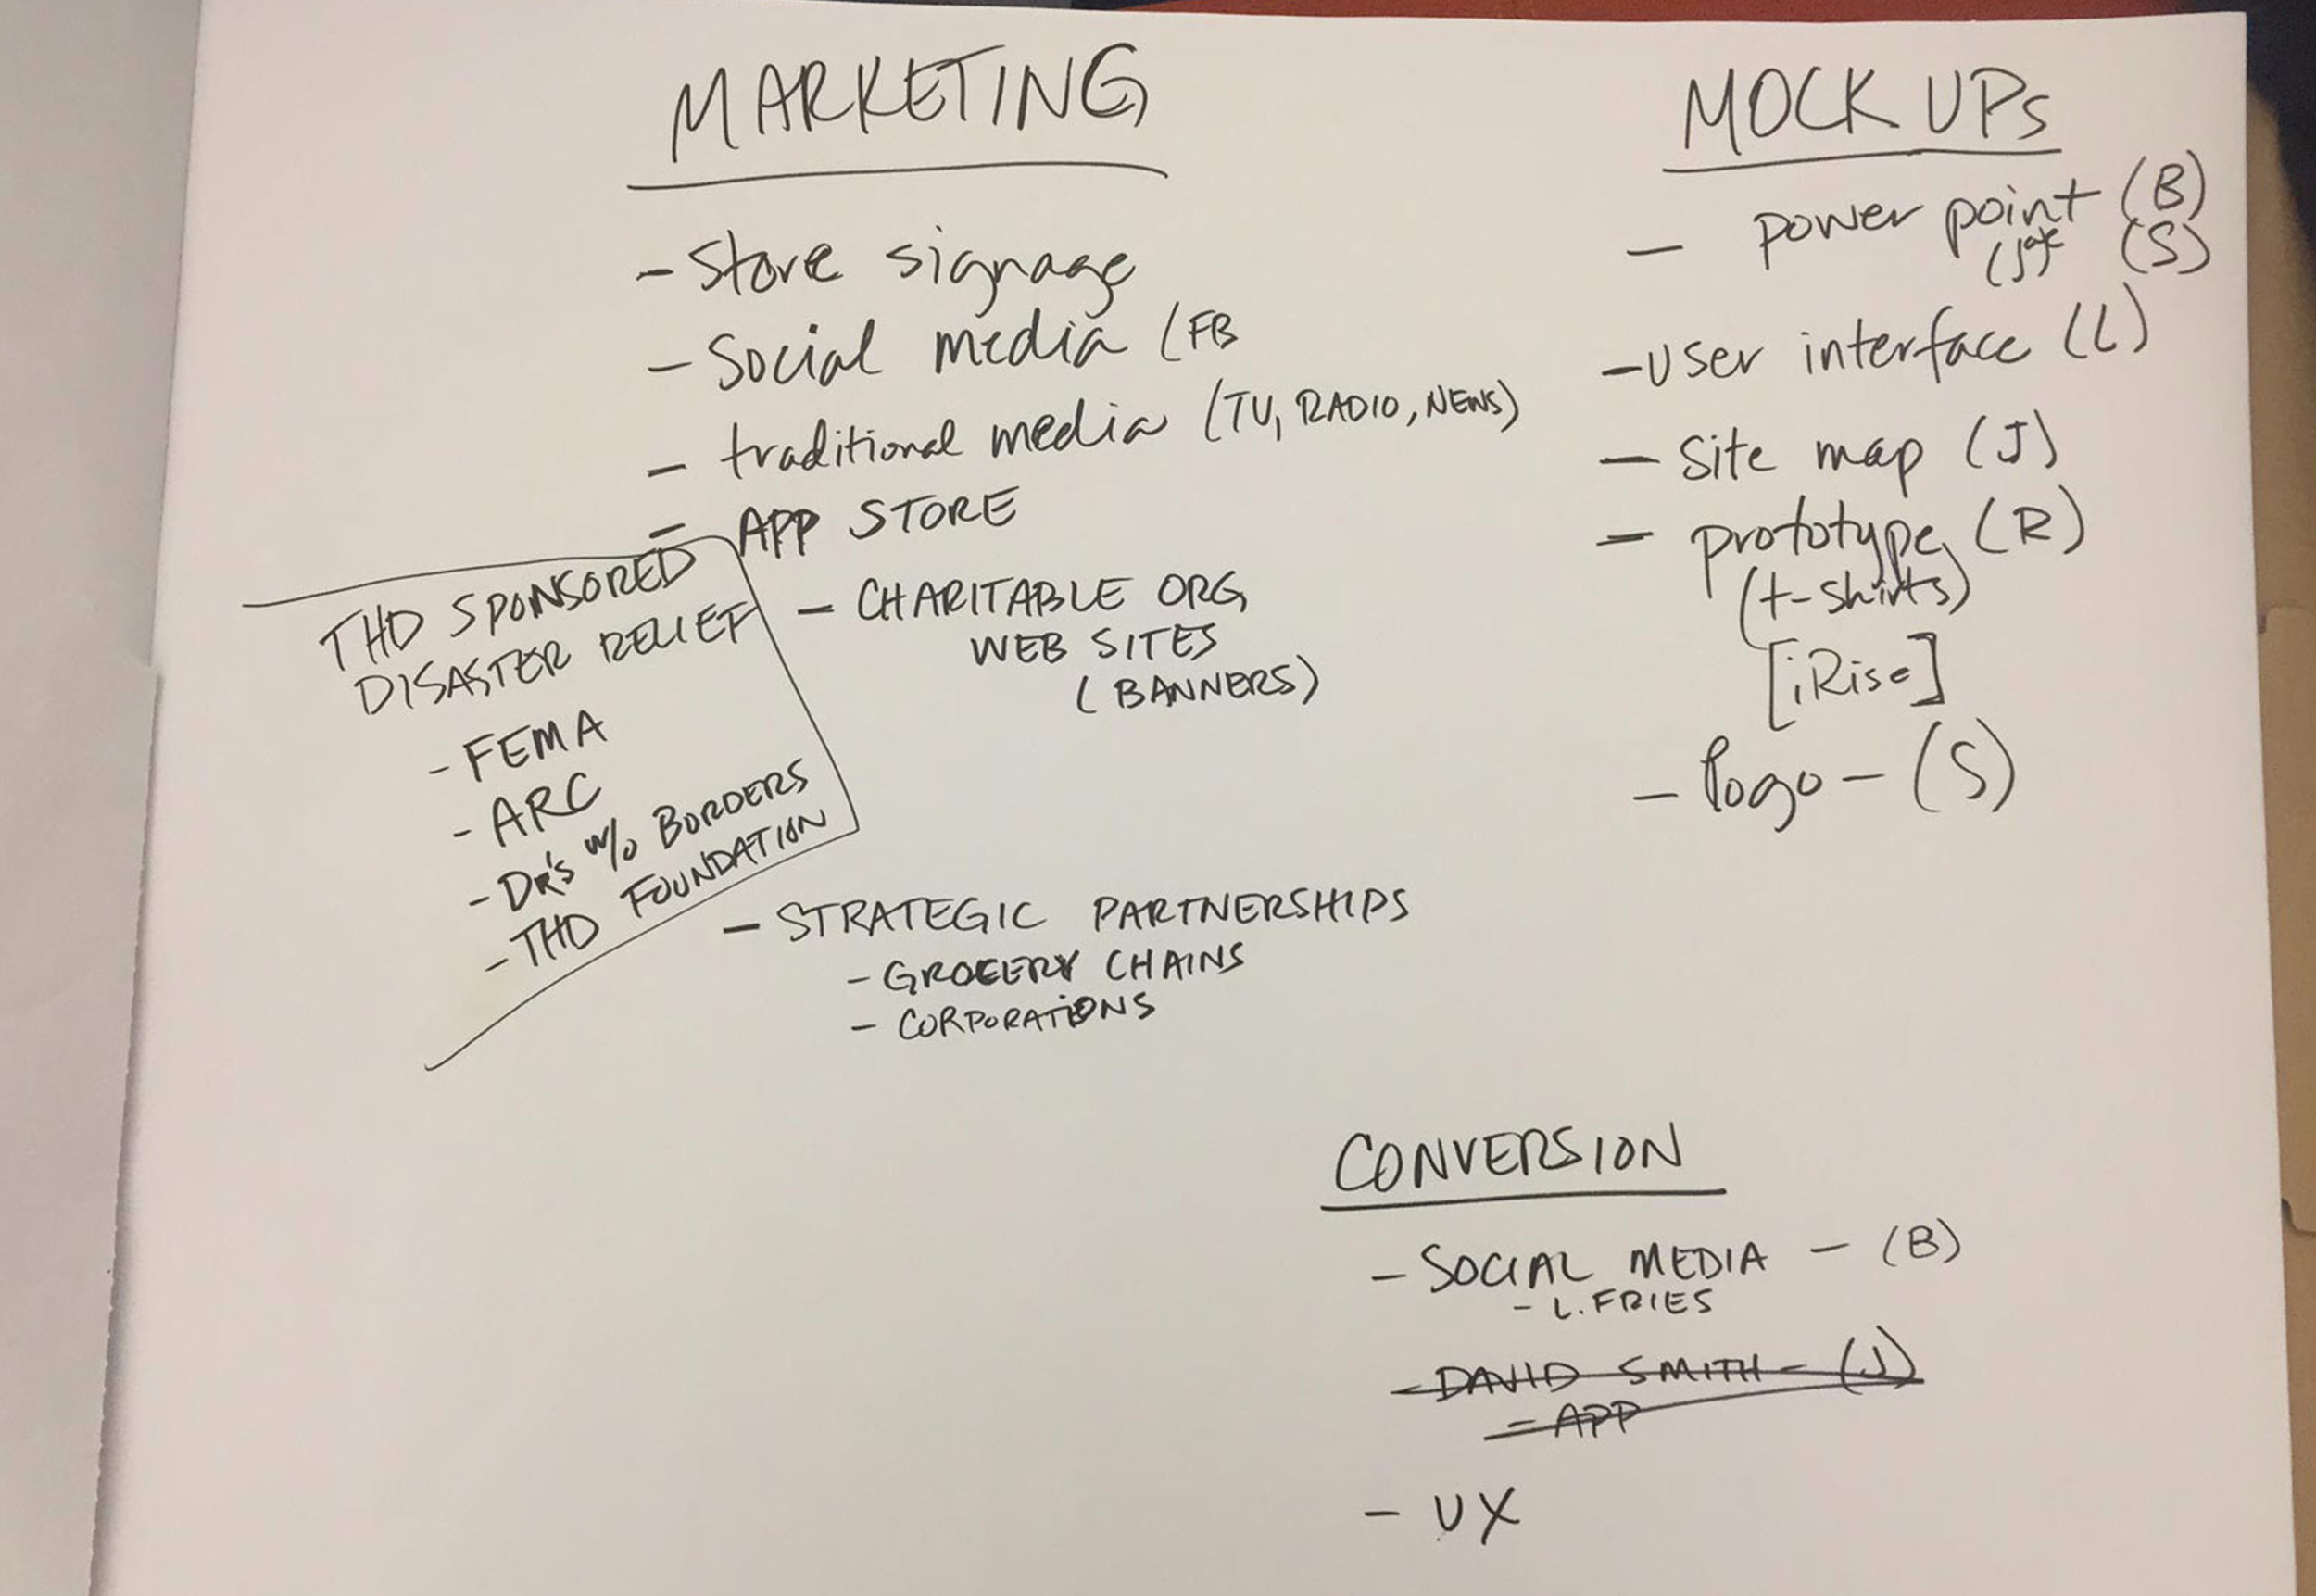
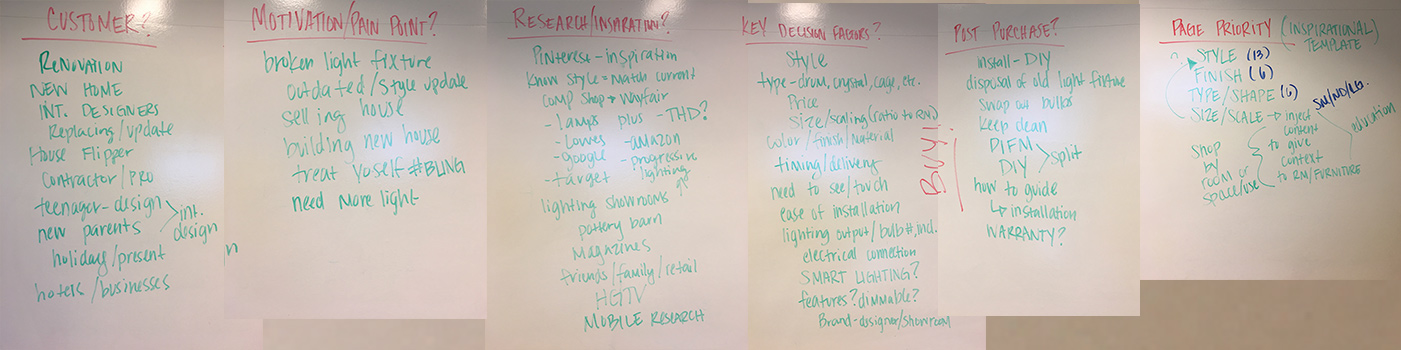
Journey Mapping - The team and I conduct a Customer Journey Mapping session for further perspective on our customer personas. We often end up with a wall full of post-it notes to better organize the ideas we uncover considering the different types of customers we have (ie. Pros, DIYers and first time home owners to name a few). I often gain valuable insight by doing a store walk and talk to Associates and internal customers in the area I am designing for.
Iterative Wire-framing/Design - I then create rough sketches of the strategy discussed in our kick-off meeting moving quickly to wire framing using applications such as Adobe XD, Invision, Omnigraffle, Axure, or Photoshop. Several iterations may be needed as I collaborate with product owners on the best path for the customers journey through the experience while keeping the business needs in mind.
User Testing - If the debate is strong enough between two designs I fully develop two versions and request user testing or A/B testing of the designs running both versions and letting the customers make the final selection with their engagement numbers.
Re-evaluate - Once the design is finalized and it is published we revisit the stats on the new design several months later to verify the customers have responded as anticipated. If needed, we make minor adjustments to the page.
EXAMPLE:
Design of chandeliers Page
The numbers reveal opportunities


Wireframe of new chandeliers Page

Final Chandeliers Page Design

Heat Maps for Lighting & Fans

Left: Before
Poor engagement spread all over the page.
Right: after
Redesigned page saw improved engagement and conversion and reduced bounce rates - success!

Top Level Tile Experience Wire #1
Designed new layout in Photoshop for a more streamlined shopping experience for Tile. Through analytics we discovered customer confusion all around on tile. Previously, we directed customers directly to the Product List Pages (PLPs) and they had to use the refinements on the left navigation to try to find what they needed. We created this blended page with obvious areas for the Kitchen and Bath uses along with educational items to better inform customers.

Level 2 - Bathroom Tile Wire #1
Designed deeper level wire for click through from the Bathroom pod on top level page - Photoshop.

Level 2 - Bathroom Tile Wire #2
Designed second layout in Photoshop showing different copy block title treatment options.

Level 2 - Kitchen Tile Wire #1
Designed deeper level wire from click through of the Kitchen Pod on Top level Tile page - Photoshop.
Mobile APP Development example -

Blab! is an app to help you find and sign up for volunteer opportunities. It started of as a much broader concept but eventually we felt this focus better represented the Home Depot Core Values.